
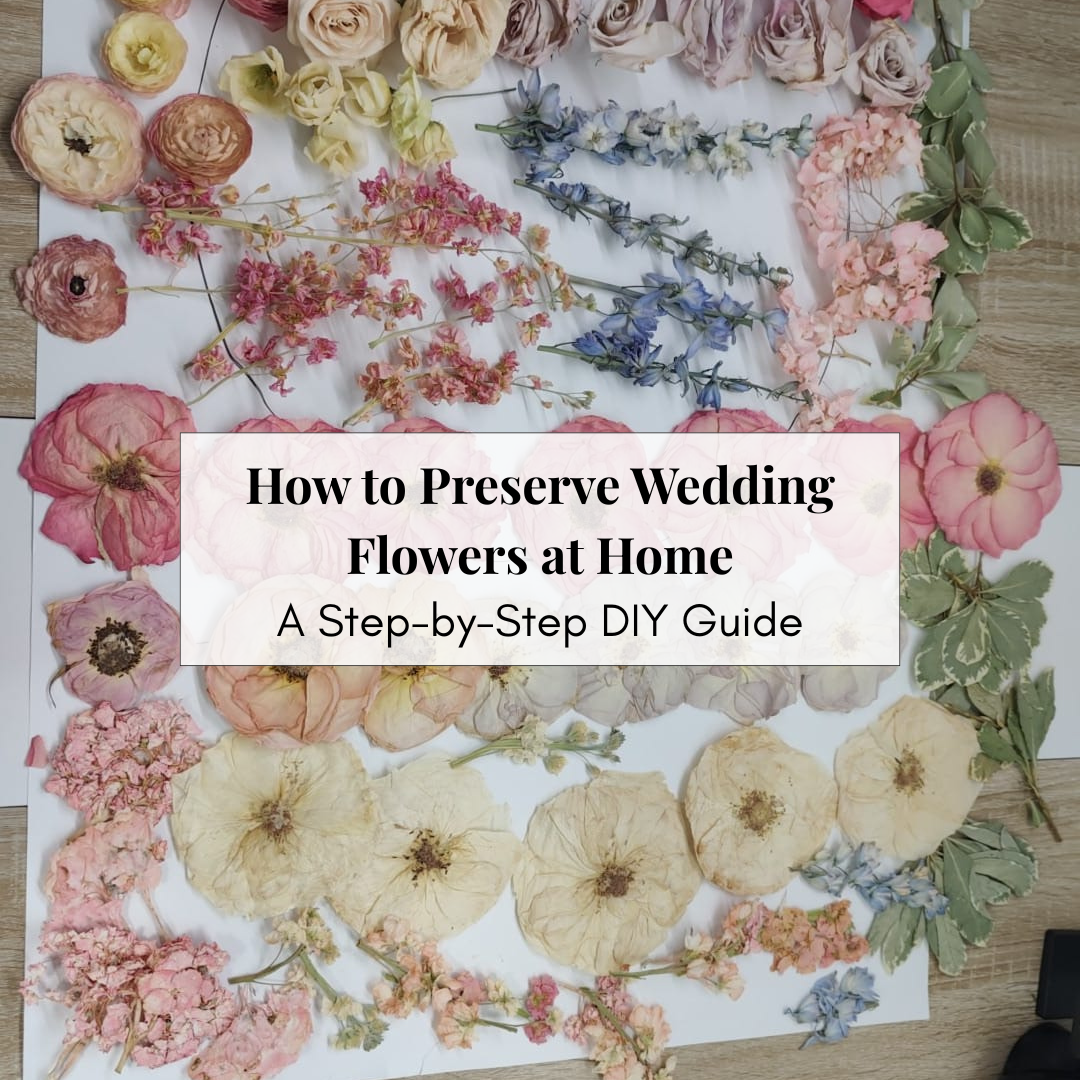
How to Preserve Wedding Flowers: A Step-by-Step Guide
If your bouquet is too wilted to mail right away, you’re on a tight budget, or you simply want to try preserving your wedding flowers yourself, this guide walks you through two realistic at-home options: pressed flower preservation and whole flower drying with silica gel. You’ll learn what to do the day after the wedding, which flowers preserve best, the supplies you actually need, and how to avoid the most common mistakes.
You’ll also get our DIY-to-Pro Rescue Plan, so if you start DIY and decide you want a professional finish, you’ll know exactly what to do at each stage. We can accept fully dried flowers at any time. The stage we worry about most is the wilted “in-between” stage, when flowers are damp enough to mold but too far gone to preserve like fresh.
For the full overview of every method and timeline, start with our pillar guide: https://wildcoastflowerpreservation.com/blogs/news/how-to-preserve-your-wedding-bouquet-everything-you-need-to-know

Start Here: Choose Your DIY Path
DIY flower preservation works best when you pick one goal upfront.
· Pressed flowers (flat): best for frames, shadow boxes, paper goods, and a clean modern look.
· Whole flowers (3D): best for keeping shape and dimension (with more color change).
If you’re still deciding what you want long-term, start with pressing. It’s the lowest risk and most forgiving.

If you already know you want functional keepsakes like coasters, trays, blocks, or wall decor, you may prefer professional preservation from the start:
· Wedding preservation: https://wildcoastflowerpreservation.com/pages/wedding-preservation
· Pressed flower preservation: https://wildcoastflowerpreservation.com/pages/pressed-flower-preservation
· Whole flower preservation: https://wildcoastflowerpreservation.com/pages/whole-flower-preservation
Before You Start: What to Do With Your Bouquet Right After the Wedding
The biggest DIY mistake is waiting too long. Flowers break down quickly.

Within 12 to 24 hours
· Get the bouquet into clean water (trim stems if possible).
· Keep it cool (air conditioning is your friend).
· Avoid heat, sun, and hot cars.
· Do not mist heavily. Too much surface moisture can encourage browning and mold.
If your bouquet is already wilted
You can still preserve it. You just need realistic expectations.
· Pressing often looks better than trying to keep a limp flower in 3D.
· Browns and translucent areas may be part of the final look.
· Some petals may fall off. Save them.
If you want to understand how “already dried” flowers behave, read: https://wildcoastflowerpreservation.com/blogs/news/air-dried-vs-silica-dried-flowers-what-you-should-know-before-you-preserve-your-bouquet

Supplies List (Simple + Realistic)
You do not need a craft store haul. Here’s what actually matters.
For both methods
· Sharp scissors or floral snips
· Paper towels
· Gloves (optional, but helpful)
· Labels or masking tape (date and flower type)
For pressing
· A flower press OR heavy books
· Absorbent paper (blotting paper, parchment, or plain printer paper)
· Cardboard sheets (optional, helps airflow)
For whole flower drying (silica)
· Silica gel (fine crystals work well)
· Airtight container with a tight lid
Option 1: Pressed Flower Preservation (DIY Step-by-Step)
Pressed flowers are the easiest way to preserve wedding blooms at home.
Step 1: Choose the right blooms
Pressing works best with:
· Roses (outer petals may bruise, inner petals press beautifully)
· Ranunculus
· Daisies
· Cosmos
· Greenery (eucalyptus, ferns)
Harder to press:
· Very thick blooms (some peonies, dense hydrangea heads)
· Super watery flowers (they can brown)
Tip: If a flower is thick, split it in half or press individual petals.

Step 2: Prep the flowers
· Remove damaged petals.
· Separate blooms from stems.
· Blot gently with a paper towel.
Step 3: Arrange in your press
· Lay flowers face-down for the most detailed look.
· Keep space between blooms.
· Add a layer of paper above and below.
Step 4: Apply pressure and wait
· Keep the press in a dry, cool spot.
· Do not peek daily. Every time you open it, you introduce humidity.
Timeline: 2 to 4 weeks for most flowers.
Step 5: Store pressed flowers safely
Once fully dry:
· Store them flat between clean paper.
· Keep away from sunlight and humidity.
Step 6: Display your pressed flowers
The simplest DIY finish is a frame.
If you want a clean, modern look:
· Use a floating glass frame
· Keep flowers out of direct sun
If you want long-term protection:
· Choose UV-protective glass when possible
If you love pressed flower results and want functional pieces (trays, coasters, wall decor), that’s what we specialize in: https://wildcoastflowerpreservation.com/pages/pressed-flower-preservation
Option 2: Whole Flower Drying With Silica Gel (DIY Step-by-Step)
Silica drying is the best at-home method for keeping flowers three-dimensional.
Step 1: Choose flowers that hold shape
Works well with:
· Roses
· Carnations
· Spray roses
· Some greenery
More challenging:
· Very delicate petals
· Flowers that bruise easily
Step 2: Prep your container
· Pour a base layer of silica gel into an airtight container.
· Make sure the container is deep enough for the bloom.
Step 3: Place flowers and cover gently
· Place blooms upright if possible.
· Slowly spoon silica around petals.
· Do not dump silica quickly. It can crush petals.
Step 4: Seal and wait
Timeline: 3 to 10 days depending on bloom thickness and humidity.
Step 5: Remove and clean
· Lift flowers carefully.
· Use a soft brush to remove silica.
Step 6: Seal (optional but recommended)
DIY dried flowers are fragile.
· A light floral sealant spray can help reduce crumbling.
· Always test on one bloom first.
What to expect with color
Even with silica, color changes happen.
· Whites can shift ivory.
· Pinks can deepen.
· Reds can darken.
If you want the most accurate color match possible, professional color correction may be worth it: https://wildcoastflowerpreservation.com/pages/color-correction-for-flower-preservation
A Real Talk Section: DIY Resin Sounds Fun, But It’s Where People Lose Money
You’ll see comments like, “I pressed mine and made a $10 frame.” That can be true.
Resin is different.
Why DIY resin gets expensive fast
· You need the right resin (not all stay clear long-term)
· You need mixing tools, molds, a level workspace, and dust control
· You need time for curing, sanding, and finishing
· Mistakes are hard to undo
The biggest DIY resin risks
· Bubbles and cloudiness
· Dust and hair trapped in the surface
· Yellowing over time
· Flowers turning transparent or “spotting”
If you want to understand spotting clearly before you attempt resin, read: https://wildcoastflowerpreservation.com/blogs/news/what-is-spotting-in-flower-preservation-understanding-natural-variations-in-resin
If your goal is a clear, heirloom-quality resin piece you can use daily, professional preservation is usually the safer route.
DIY-to-Pro Rescue Plan: What to Do If You Change Your Mind
If you start DIY and realize you want a professional finish, don’t assume it’s over. We often work with:
· Partially dried bouquets
· Loose petals saved from a bouquet
· Pressed flowers you’ve already started
The key is to keep everything dry and protected.
Stage 1: Fresh (best-case scenario)
What it looks like: bouquet is still fresh or only slightly soft, petals look normal, stems aren’t slimy, no mold smell.
What to do:
· If you want to switch to professional preservation immediately, reach out right away.
· If you can’t ship immediately, start DIY drying today (silica or pressing) to stabilize the flowers first.
If you want a predictable shipping option, we offer a flat-rate overnight label: https://wildcoastflowerpreservation.com/products/prepaid-overnight-shipping-label
Stage 2: Wilted / “In Between” (most risky)
What it looks like: flowers are droopy, petals feel thin or translucent, edges are browning, stems may feel damp.
What to do (important):
· Do not seal in an airtight container while they’re still damp.
· Do not ship them wilted if you can avoid it.
· Stabilize first with DIY drying:
o Silica gel drying for dimension
o Pressing for a safer “pause button”
If you’re unsure which direction to go, start with pressing. It’s more forgiving.
Stage 3: Fully dried (yes, we can take these anytime)
What it looks like: flowers feel papery, crisp, lightweight. No dampness. Stems snap easily.
What to do:
· You can send them to us whenever you’re ready.
· Store them in a dry box with gentle padding, away from humidity and sunlight.
From here, we can preserve your dried flowers into keepsakes using our UV-resistant epoxy resin. If you’re ready to explore options:
· Whole flower preservation: https://wildcoastflowerpreservation.com/pages/whole-flower-preservation
· Pressed flower preservation: https://wildcoastflowerpreservation.com/pages/pressed-flower-preservation
Stage 4: Moldy / mushy / smells off
What it looks like: visible mold, slimy stems, strong odor, petals sticking together, dampness that won’t go away.
What to do:
· Don’t ship yet.
· Take a few clear photos and contact us first so we can advise on what’s salvageable.
Contact: https://wildcoastflowerpreservation.com/pages/contact
When DIY Makes Sense (And When It Doesn’t)
DIY is a great fit if:
· You want a simple pressed frame
· You’re okay with natural imperfections
· Your bouquet is already too far gone to ship
· You enjoy crafting and experimenting
Professional preservation is a better fit if:
· You want functional resin pieces (trays, coasters, blocks)
· You want design approval and guided support
· You want the best chance at long-term clarity
· You want multiple keepsakes from one bouquet
Explore professional options here: https://wildcoastflowerpreservation.com/pages/wedding-preservation
FAQ
Can I preserve flowers that are already brown?
Yes, but brown areas won’t reverse. Pressing can still create a beautiful, vintage look.
How long do pressed flowers last?
Kept out of sunlight and humidity, pressed flowers can last for years. UV exposure is what fades them fastest.
Can I ship my bouquet instead of DIY?
Yes, and it’s often easier than people expect. If you want a predictable option, we offer a flat-rate overnight label: https://wildcoastflowerpreservation.com/products/prepaid-overnight-shipping-label
Ready for the Next Step?
If you want to DIY, I hope this guide helps you do it with confidence and realistic expectations.
If you want a keepsake you can use every day, we’d love to preserve your bouquet professionally:
· Wedding preservation: https://wildcoastflowerpreservation.com/pages/wedding-preservation
· Pressed flower preservation: https://wildcoastflowerpreservation.com/pages/pressed-flower-preservation
· Whole flower preservation: https://wildcoastflowerpreservation.com/pages/whole-flower-preservation
· FAQs: https://wildcoastflowerpreservation.com/pages/faqs
· Contact: https://wildcoastflowerpreservation.com/pages/contact
A little bouquet goes a long way.
Written by Michelle Besu